
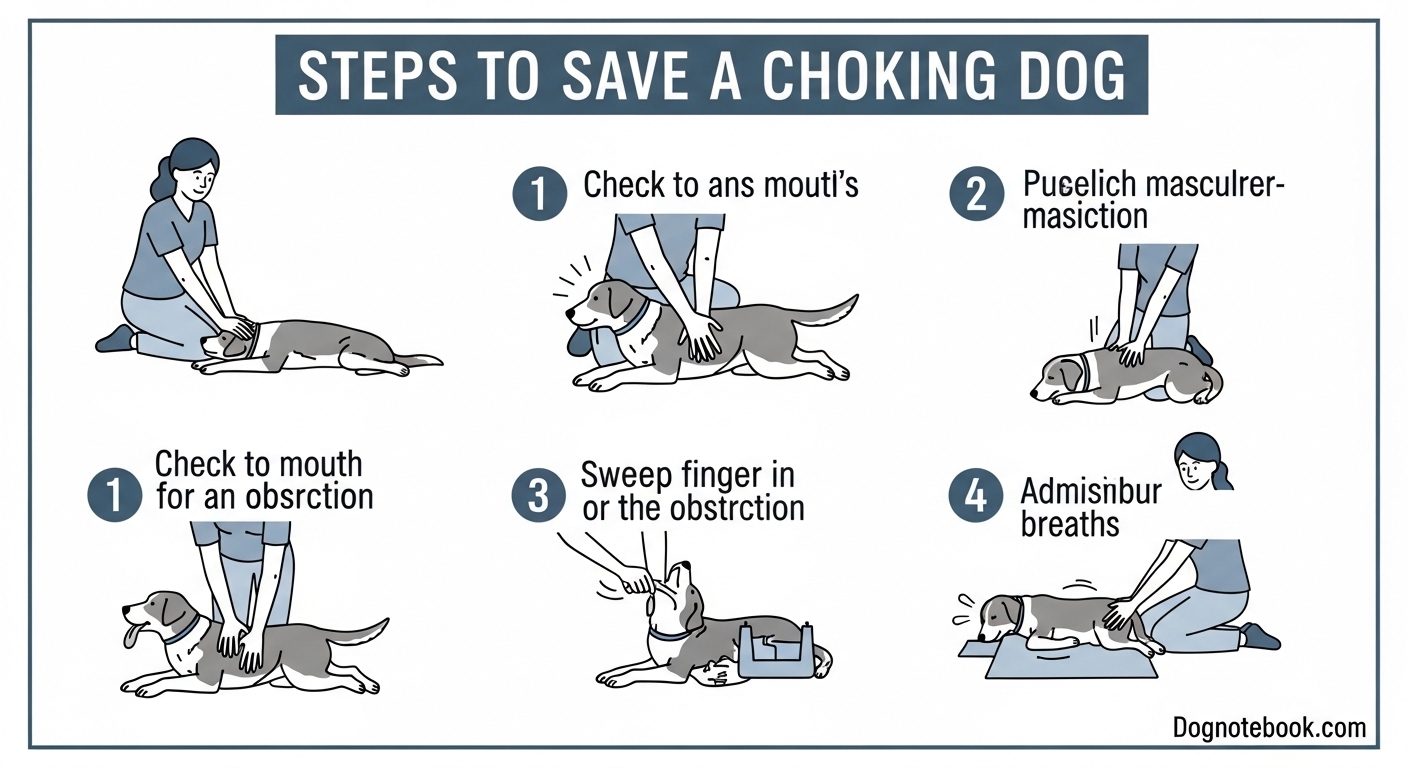
Nothing is more terrifying than watching your dog choke. One second everything is fine, and the next your dog is gagging, pawing at their mouth, or struggling to breathe. I have been in that exact situation, and I know firsthand how fast panic sets in. But knowing what to do for a choking dog before reaching the vet can mean the difference between life and death for your pet.
This guide walks you through every step, from recognizing the real signs of choking to performing the Heimlich maneuver on dogs of any size. I will also help you tell the difference between actual choking and other conditions that look similar, like reverse sneezing or kennel cough. By the end, you will have a clear action plan you can rely on in an emergency.
Choking cuts off oxygen to your dog’s brain. Brain damage can begin in as little as 3 to 4 minutes without air, so the actions you take in those first moments matter enormously. Let me walk you through exactly what to do.
Table of Contents
Signs Your Dog Is Choking (Not Just Coughing)
The first step is recognizing a real choking emergency. Many dog owners mistake gagging, reverse sneezing, or a mild cough for choking. True choking means something is physically blocking your dog’s airway, and your dog cannot breathe normally.
Here are the signs that tell you your dog is genuinely choking:
- Pawing at the mouth or face – Your dog may frantically swipe at their mouth with their front paws.
- Excessive drooling – Sudden, heavy drooling often accompanies a blocked airway.
- Gagging or retching without producing anything – Your dog tries to vomit but nothing comes up.
- Difficulty breathing – Labored, loud, or wheezing breaths.
- Blue or pale gums – This signals oxygen deprivation and is a critical emergency.
- Panic and restlessness – Pacing, wide eyes, rubbing the face on the ground.
- Extended head and neck – Your dog may stretch their neck out trying to open the airway.
One thing most people do not realize: choking can be completely silent. Your dog cannot cry out or bark when their airway is blocked. If your dog goes quiet suddenly while eating or chewing on something, that silence itself is a warning sign.
Choking vs. Reverse Sneezing vs. Kennel Cough
This is one of the biggest sources of confusion I see from dog owners, and forum discussions confirm it. Here is how to tell them apart:
Reverse sneezing sounds alarming – like rapid, forceful snorting or honking. Your dog will stand still, extend their neck, and make loud inhalation sounds. It looks scary, but reverse sneezing is not life-threatening. It usually passes on its own within 30 seconds to a minute. Gently massaging your dog’s throat or briefly covering their nostrils can help stop an episode.
Kennel cough produces a persistent, honking cough that sounds like your dog has something stuck in their throat. But your dog can still breathe normally between coughs, and they will usually still eat and drink. Kennel cough needs a vet visit but is not an immediate emergency.
True choking means your dog cannot breathe properly, is in visible distress, and may have blue gums. If your dog is truly choking, they cannot settle down, cough productively, or recover on their own. That is when you need to act immediately.
What to Do for a Choking Dog Before Reaching the Vet: Step-by-Step
When your dog is choking, every second counts. Follow these steps in order. The goal is to clear the airway and keep your dog alive until you can reach a veterinary hospital.
Step 1: Stay calm and assess. I know this is easier said than done, but your dog picks up on your energy. Take one deep breath. Look at your dog’s gums – if they are pink, you have a little time. If they are blue, white, or pale, move fast. Determine if your dog can still move some air around the object. Any breathing, even noisy breathing, is better than none.
Step 2: Open the mouth and look inside. Have someone hold your dog if possible. Press your thumbs on the sides of the upper jaw behind the canine teeth to gently pry the mouth open. Tilt the head slightly upward. Look deep into the throat with a flashlight if you have one handy. If you can see the object and it is loose enough to grab, use your fingers or a pair of pliers to carefully pull it out.
Be careful here. Forum discussions reveal that many owners worry about getting bitten during this step. If your dog is panicking, wrap them in a towel or blanket to restrain them safely. Never push blindly into the throat – you risk pushing the object deeper and making the blockage worse.
Step 3: Perform abdominal thrusts (the Heimlich maneuver for dogs). If you cannot see or reach the object, it is time for abdominal thrusts. How you do this depends on your dog’s size, and I cover the specific techniques for small, medium, and large dogs in the next section.
The basic principle for a medium or large dog: stand or kneel behind your dog. Wrap your arms around their belly, just below the ribcage. Make a fist with one hand and place it just behind the last rib. Grasp your fist with your other hand. Give 5 quick, upward thrusts – think about pushing up and in, toward your dog’s spine. Check the mouth after each round.
Step 4: Give 5 back blows. If abdominal thrusts do not dislodge the object, use the heel of your hand to deliver 5 firm blows between your dog’s shoulder blades. This is the “5 by 5 rule” you may have heard about: 5 abdominal thrusts, then 5 back blows, alternating until the object comes loose.
Step 5: Recheck the mouth and repeat. After each round of thrusts and back blows, open the mouth again and look for the object. Sweep your finger along the inside of the cheek and throat – but again, do not push anything deeper. If the object is still stuck, repeat Steps 3 and 4. Keep going until the airway is clear or you reach the vet.
What to Do If Your Dog Becomes Unconscious
If your dog loses consciousness during a choking episode, the situation becomes even more urgent. Lay your dog on their right side on a flat surface. Open the mouth and do one more finger sweep to check for the object.
If the airway is clear but your dog is not breathing, begin rescue breathing. Close your dog’s mouth, extend their neck to straighten the airway, and breathe directly into their nostrils. Give 2 breaths, watching for the chest to rise. If the chest does not rise, the airway may still be blocked – do 5 more abdominal thrusts and check again.
If your dog has no heartbeat, begin CPR. Perform 30 chest compressions followed by 2 rescue breaths. For chest compressions, place your hands on the widest part of the chest and compress about one-third to one-half of the chest width. Continue CPR and rescue breathing until you reach the emergency veterinary hospital. Even if you are driving, someone in the car should continue these efforts.
Techniques for Different Dog Sizes
The Heimlich maneuver works differently depending on how big your dog is. A Chihuahua and a Great Dane need very different approaches. Here is exactly how to handle each size.
Small Dogs and Puppies (Under 20 lbs)
For small dogs and puppies, you can easily manage their whole body. Pick your dog up and hold them in your lap or against your chest, spine against your body with their head facing up. Place the palm of one hand against your dog’s abdomen, just below the ribcage. Use your other hand to support their back. Give 5 quick, gentle upward thrusts. The key word here is gentle – small dogs are fragile, and you do not want to crack a rib or damage internal organs.
If abdominal thrusts do not work, turn your dog around so they face away from you. Support their chest with one hand and use the heel of your other hand to deliver 5 firm back blows between the shoulder blades. For puppies, you can also try holding them upside down by their back legs and giving a gentle shake to let gravity help dislodge the object.
Medium Dogs (20-60 lbs)
Medium dogs are the most straightforward to work with. Have your dog stand or kneel behind them. Wrap your arms around their belly just below the ribcage, make a fist with one hand, and place it right behind the last rib. Grasp your fist with the other hand and give 5 quick, upward thrusts. You want to push in and up firmly enough to create pressure that forces air out of the lungs and dislodges the blockage.
If needed, follow with 5 back blows using the heel of your hand between the shoulder blades. For medium dogs that are still standing, you can also try lifting their back legs slightly to angle the body downward, which lets gravity assist the process.
Large Dogs (Over 60 lbs)
Large dogs present a unique challenge because you likely cannot lift them. If your dog is standing, kneel beside them rather than behind. Place your arms around their abdomen below the ribcage and perform the same 5 upward thrusts. If your dog has collapsed or is too heavy to support from behind, lay them on their side. Kneel behind them and place both hands on their abdomen just below the ribcage. Push upward and forward with firm, quick thrusts.
For back blows on a large dog that is standing, stand beside them and use the heel of your hand to strike firmly between the shoulder blades. If the dog is lying down, roll them slightly toward you and deliver blows to the upper side of their back. Large dogs may tolerate more force than small dogs, but you should still aim for controlled, directed pressure rather than raw power.
When to Rush to the Emergency Vet
Here is the most important takeaway from this entire article: you should always take your dog to the vet after any choking incident, even if you successfully removed the object and your dog seems fine. This is not optional.
Why? Because the object may have caused damage you cannot see. A bone fragment or piece of a toy could have scratched or torn the esophagus. Small pieces may still be lodged deeper in the throat than you could see. Your dog could have aspirated material into their lungs, which can lead to pneumonia within hours. The inside of the mouth and throat can swell after trauma, causing delayed breathing problems.
Go to the emergency vet immediately if:
- Your dog’s gums are blue, white, or pale.
- Your dog lost consciousness at any point.
- Your dog is still struggling to breathe after the object was removed.
- You could not fully remove the object.
- Your dog is coughing up blood.
- You performed abdominal thrusts or back blows (your vet should check for rib or internal injuries).
Even if none of the above apply, call your vet and schedule an examination within 24 hours. Explain what happened, what the object was, and what steps you took. Your vet may want to sedate your dog and examine the throat with an endoscope to rule out hidden damage.
Post-Vet Follow-Up Care
After your vet has examined your dog, plan to monitor them closely for 48 hours. Watch for these signs that something may still be wrong: persistent coughing, refusal to eat or drink, drooling more than usual, gagging when swallowing, or lethargy. If any of these appear, call your vet right away. Your dog may have developed esophagitis, an inflammation of the esophagus that can cause scarring and narrowing if left untreated.
I also want to address something I see frequently in forums: the guilt and worry owners carry after a choking incident. It is completely normal to feel shaken. Many owners second-guess whether they did the right thing or caused damage during the rescue. Talk to your vet about your concerns. They can reassure you or catch anything you might have missed. You acted in an emergency, and that took courage.
How to Prevent Your Dog from Choking
The best emergency is the one that never happens. Here are practical steps you can take right now to reduce your dog’s choking risk.
Choose the right sized toys and balls. This is the single biggest preventable risk factor, especially for small dogs. A ball should be large enough that your dog cannot fit it entirely past their teeth. If a ball can fit completely inside your dog’s mouth, it is a choking hazard. Tennis balls are fine for medium and large dogs but can be risky for toy breeds. Many forum users report balls getting stuck in their dog’s throat more than once.
Be selective about treats and chews. Avoid hard treats that can splinter, like cooked bones, antlers that have worn down to small nubs, or brittle rawhide. Nylabone-style chews can become choking risks once they are worn down. When in doubt, size up. A treat should be large enough that your dog has to gnaw on it rather than attempt to swallow it whole.
Supervise mealtime and chew time. Dogs that gulp their food are at higher risk. If your dog eats too fast, consider a slow feeder bowl. Always stay nearby when your dog is chewing on a bone, toy, or long-lasting treat. Puppies are especially vulnerable because they explore the world with their mouths and have not learned what is safe to swallow.
Keep small household items out of reach. Socks, rubber bands, string, dental floss, coins, and small children’s toys are all common causes of choking and intestinal blockages. Do a sweep of your floors and low surfaces regularly, especially if you have a curious puppy.
Train a solid “drop it” command. This is one of the most valuable commands you can teach your dog. If your dog picks up something dangerous, a reliable “drop it” can prevent them from swallowing it before you even have to intervene physically.
Frequently Asked Questions
Should you take a dog to the vet after choking?
Yes, always. Even if you removed the object and your dog seems perfectly fine, take them to the vet. The object may have scratched or torn the esophagus, small pieces might still be lodged deeper in the throat, or your dog may have aspirated material into their lungs. Internal damage is not always visible right away, and conditions like esophagitis or aspiration pneumonia can develop hours later. A vet can examine the throat with an endoscope and catch problems early.
What is the 5 by 5 rule for choking?
The 5 by 5 rule is a simple memory aid for responding to a choking dog: alternate between 5 abdominal thrusts (Heimlich maneuver) and 5 back blows between the shoulder blades. After each set of 5, check the dog’s mouth to see if the object has been dislodged. Repeat this cycle until the airway is clear or you reach veterinary care.
What is the 7 second rule for dogs?
The 7 second rule refers to the critical window for checking if your dog’s airway is truly blocked. If your dog has not taken a breath within about 7 seconds of showing choking signs, the airway is likely fully obstructed and you need to begin emergency interventions immediately. After roughly 3 to 4 minutes without oxygen, brain damage can begin, so fast action is essential.
How to properly help a choking dog?
Follow these 5 steps: 1) Stay calm and check if your dog can move any air. 2) Open the mouth and look inside – use a flashlight and carefully pull out any visible object with your fingers. 3) Perform 5 abdominal thrusts (Heimlich maneuver) by pushing upward just below the ribcage. 4) Give 5 firm back blows between the shoulder blades. 5) Recheck the mouth and repeat the cycle until the object is dislodged. If your dog loses consciousness, begin rescue breathing and CPR. Always visit a vet afterward, even if your dog seems to recover fully.
Be Prepared Before It Happens
Knowing what to do for a choking dog before reaching the vet comes down to five things: recognize the real signs of choking, check the mouth carefully, perform abdominal thrusts and back blows in alternating sets, adjust your technique for your dog’s size, and always follow up with a veterinarian. Every dog owner should know these steps, especially if you have a small breed, a puppy, or a dog that likes to chew aggressively. Save your emergency vet’s number in your phone today, and take a moment to practice positioning your hands for abdominal thrusts on your dog. When an emergency happens, preparation is what saves lives.