
When my dog sliced his paw on a hidden piece of glass during our evening walk, I was grateful I had spent an afternoon assembling a proper first aid kit. Having the right supplies within arm’s reach turned what could have been a panicked drive to the emergency vet into a calm, manageable situation. If you are a dog owner, building a collection of dog first aid kit essentials to keep at home is one of the most practical things you can do for your pet’s safety and your own peace of mind.
Canine emergencies do not send a warning. From minor scrapes and insect stings to more serious cuts and sudden illness, being prepared means you can act fast when every second counts. A well-stocked kit lets you stabilize your dog, manage pain, and prevent infections while you decide whether a vet visit is necessary.
In this guide, we will walk through every item you should have on hand, how to use each one properly, and how to keep your kit organized and current. Whether you are putting together a kit for the first time or auditing one you built years ago, this resource covers everything you need to know.
Table of Contents
What Is a Dog First Aid Kit?
A dog first aid kit is a dedicated collection of medical supplies and tools assembled specifically to handle canine health emergencies at home or on the go. It is not the same as a human first aid kit, and that distinction matters more than most people realize.
Dogs have different anatomies, sensitivities, and treatment needs compared to humans. Products that are harmless to us, like certain antiseptics and pain medications, can be toxic to dogs. A proper pet first aid kit accounts for these differences with canine-safe alternatives.
Think of your dog first aid kit as your first line of defense. It provides the supplies you need to clean wounds, stop bleeding, stabilize injuries, take vital readings like temperature, and keep your dog comfortable until professional veterinary care is available. Having one ready at home means you are never caught unprepared when the unexpected happens.
Dog First Aid Kit Essentials: Tools and Instruments
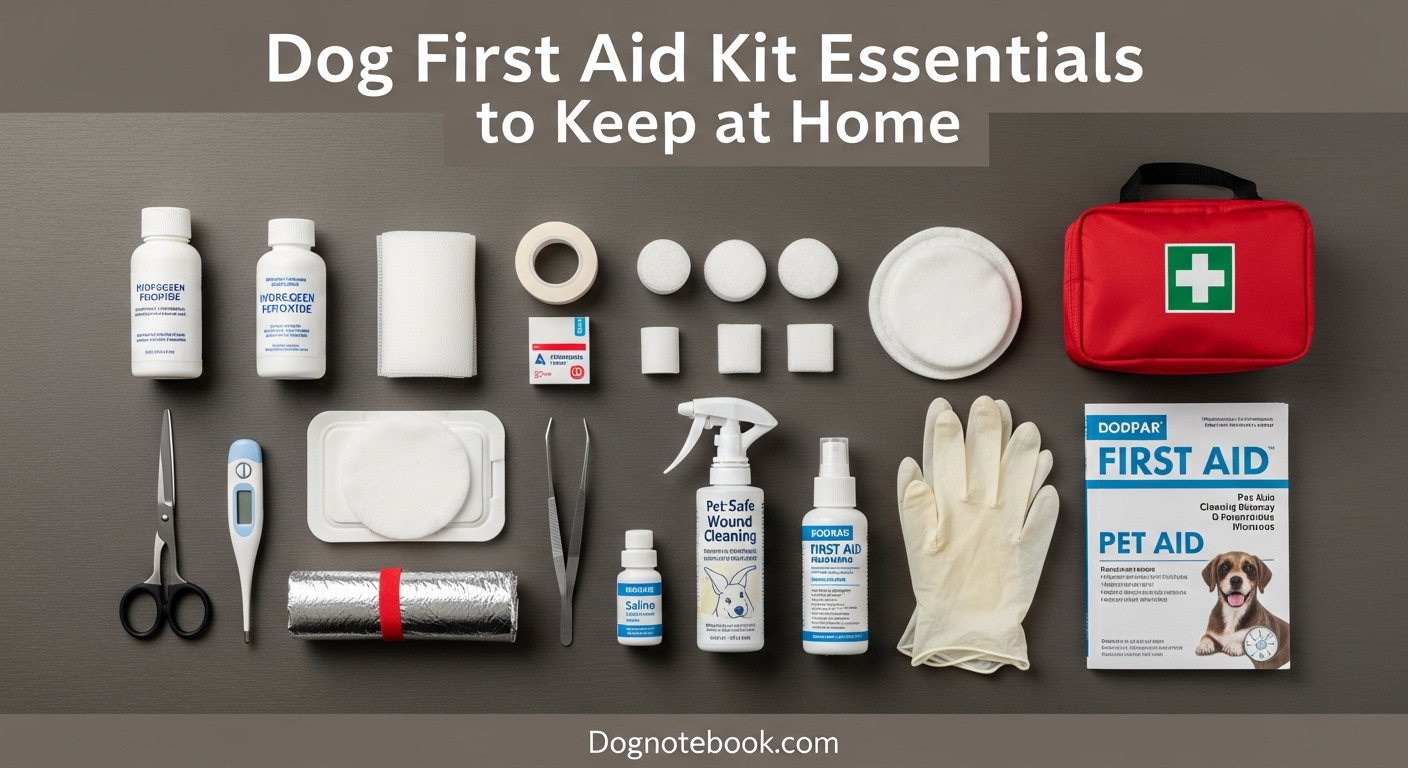
The foundation of any pet emergency kit is a set of reliable, multi-purpose tools. These are the items you will reach for most often, from removing a tick after a hike to trimming bandages to the right length. Here are the tools every dog owner should have:
- Blunt-tip scissors – Used for cutting bandages, tape, and fur away from wounds without risking an accidental puncture. Blunt tips are a safety must when working near a squirming, injured dog.
- Tweezers – Essential for removing splinters, thorns, foxtails, and insect stingers. A fine-point pair gives you the precision you need for small embedded objects.
- Digital thermometer (rectal) – A dog’s normal temperature ranges from 101 to 102.5 degrees Fahrenheit. A fever or abnormally low temperature is often the first sign something is wrong, and you cannot gauge it by touch.
- Tick remover tool – Specialty tick removers like tick keys or hooks extract the entire tick, including the head, in one motion. This reduces the risk of infection and disease transmission far better than using your fingers.
- Needleless syringe – Used for flushing wounds with saline, administering liquid medications, or feeding a dog who cannot eat normally. A 10 to 20 mL size covers most at-home needs.
- Muzzle – Even the sweetest dog may bite when in severe pain. A properly fitted muzzle protects you and any helpers while you provide care. Choose a basket-style muzzle that allows panting.
- Disposable gloves – Nitrile gloves protect both you and your dog from cross-contamination when handling wounds or bodily fluids. Keep at least five pairs in your kit.
- Flashlight or headlamp – Small injuries are hard to assess in dim light. A compact LED flashlight helps you see what you are dealing with, especially during nighttime emergencies.
I keep all of these tools in a clear, zippered pouch at the top of my kit so they are immediately visible. When your dog is hurt, fumbling through a disorganized pile of supplies only adds stress to an already tense moment.
Wound Care Supplies Every Dog Kit Needs
Wound care is the most common reason you will open your first aid kit. Dogs explore the world with their noses and paws, and minor cuts, scrapes, and punctures are part of life. These supplies let you clean, protect, and monitor injuries so they heal cleanly.
- Gauze pads (3×3 inch and 4×4 inch) – Use gauze pads to apply direct pressure on bleeding wounds and to clean injuries with saline. Non-stick varieties are ideal because they will not pull at clots when removed.
- Gauze rolls – Gauze wraps secure pads in place and can be used as a makeshift tourniquet in severe bleeding situations. Keep both 2-inch and 3-inch widths on hand.
- Self-adhering bandages (vet wrap) – These stretchy wraps cling to themselves without adhesive, so they will not stick to your dog’s fur or skin. They are perfect for covering gauze on legs, paws, and tails.
- Antiseptic wipes – Pre-moistened antiseptic wipes that contain chlorhexidine or povidone-iodine are safe for cleaning minor wounds on dogs. Avoid wipes that contain alcohol, which stings and damages tissue.
- Saline solution (0.9%) – Sterile saline is the safest wound flush available. It cleans debris from cuts without irritating tissue. It also works for flushing your dog’s eyes if they get dust or debris lodged in them.
- Antibiotic ointment (pet-safe) – A thin layer of triple-antibiotic ointment on a cleaned wound helps prevent infection. Apply only to superficial cuts and scrapes, and prevent your dog from licking the area.
- Styptic powder – If you have ever cut a dog’s nail too short, you know how much blood a quick clip can produce. Styptic powder stops nail bleeding almost instantly on contact. It is one of those items you rarely need but will be extremely glad to have.
- Medical tape – Hypoallergenic medical tape secures bandages and dressings. Choose a breathable, easy-to-tear variety so you can work quickly with one hand.
After cleaning and bandaging a wound, check it twice a day for signs of infection like redness, swelling, discharge, or a foul odor. If any of these develop, contact your veterinarian promptly.
Medications to Keep in Your Dog First Aid Kit
Medications are where many dog owners get confused, and for good reason. What is safe for humans is often dangerous for dogs, and dosages depend heavily on your dog’s weight. Always talk to your veterinarian before administering any medication, but having these items on hand gives you a head start in an emergency.
- Hydrogen peroxide (3%) – Used to induce vomiting in cases of accidental poisoning, but only under veterinary guidance. Never use hydrogen peroxide on wounds, as it damages healthy tissue and delays healing.
- Diphenhydramine (Benadryl) – Safe for most dogs to treat allergic reactions, insect stings, and facial swelling. The standard dose is 1 mg per pound of body weight, but confirm with your vet first, especially if your dog has other health conditions.
- Your dog’s regular prescription medications – If your dog takes daily medication for a chronic condition like hypothyroidism, arthritis, or heart disease, keep a small backup supply in your kit. This ensures you are covered during evacuations or if your main supply runs out unexpectedly.
- Eye wash solution – Sterile eye wash (not contact lens solution) can flush irritants, chemicals, or debris from your dog’s eyes. This is a different product from saline wound wash, though both are useful.
- Pet-safe paw balm – While not a medication per se, paw balm soothes cracked pads, hot pavement burns, and minor irritation. It is especially valuable during extreme weather months.
Important: Never give your dog ibuprofen, acetaminophen (Tylenol), or aspirin unless specifically instructed by your veterinarian. These common human medications can cause kidney failure, liver damage, and gastrointestinal bleeding in dogs, even at small doses.
Emergency Contact and Preparedness Items
Supplies are only part of a complete kit. The items in this section help you act fast, communicate clearly with veterinary professionals, and keep your dog safe during evacuations or natural disasters.
- Emergency contact card – Write down your regular vet’s phone number, the nearest 24-hour emergency vet clinic, and the ASPCA Animal Poison Control Center (888-426-4435). Laminate the card or put it in a waterproof bag.
- Emergency blanket (Mylar) – A foil emergency blanket retains body heat and is invaluable for dogs in shock. Wrap it loosely around your dog after a trauma to prevent hypothermia while you transport them to the vet.
- Collapsible bowl – Useful for offering water or food during emergencies, evacuations, or long car rides. They take up almost no space and weigh next to nothing.
- Extra leash and slip lead – A slip lead doubles as a collar and leash in one, which is helpful if your dog’s collar breaks or comes off during an incident. Keep one in your kit at all times.
- Recent photo of your dog – A printed photo helps identify your dog if you become separated during an emergency. Include a written description of distinguishing marks and your contact information.
- Copies of vaccination records – Having proof of current vaccinations is essential if you need to visit an emergency clinic that has never seen your dog before. It saves time and helps the vet make informed treatment decisions.
I also recommend storing a small amount of your dog’s favorite high-value treats in a sealed bag. A stressed, injured dog may refuse to cooperate, and treats can help calm them enough for you to provide basic care or load them into the car.
How to Build Your Dog First Aid Kit at Home
Assembling your own canine first aid supplies gives you more control over quality and completeness than buying a pre-made kit. Most pre-assembled kits are missing key items or include low-quality versions of important tools. Here is how to build one the right way:
Step 1: Choose the right container. Pick a waterproof, durable container with a secure lid. A plastic tackle box, a nylon zippered bag, or a dedicated first aid pouch all work well. Label it clearly with a permanent marker or a printed label that says “Dog First Aid Kit.”
Step 2: Organize items by category. Use small ziplock bags or internal compartments to group related items together. Keep tools in one section, wound care in another, and medications separate from everything else. This organization saves precious time during an emergency.
Step 3: Add your tools and instruments. Place blunt-tip scissors, tweezers, your digital thermometer, tick remover, needleless syringe, muzzle, gloves, and flashlight in an easily accessible compartment. These are the items you will reach for first.
Step 4: Stock wound care supplies. Gauze pads, gauze rolls, vet wrap, antiseptic wipes, saline solution, antibiotic ointment, styptic powder, and medical tape should all be grouped together so you can grab everything you need for a bandage change in one motion.
Step 5: Include medications and emergency contacts. Place medications in sealed, labeled containers with expiration dates visible. Tape your emergency contact card to the inside lid of the kit so it is always visible when you open it.
Step 6: Store the kit in an accessible location. Keep your kit in a consistent, easy-to-reach spot. Tell everyone in your household where it is. If you have a routine vet care routine established, store the first aid kit near your dog’s other supplies so it becomes part of your regular pet care system.
When to Use Your Kit vs. When to Go to the Vet
Knowing when you can handle a situation at home and when you need professional help is one of the most important skills a dog owner can develop. Your first aid kit is designed for stabilization and minor care, not for replacing veterinary treatment.
Situations where home first aid is usually appropriate:
- Minor cuts and scrapes that are shallow and not actively bleeding heavily
- Small splinters or thorns that can be removed with tweezers
- Single tick removal when the tick has not been embedded for long
- Minor paw pad irritation from hot pavement or rough terrain
- Small insect stings with localized swelling but no difficulty breathing
Situations that require immediate veterinary care:
- Uncontrolled bleeding that does not stop after 10 minutes of direct pressure
- Difficulty breathing, excessive panting, or pale/blue gums
- Seizures, loss of consciousness, or collapse
- Suspected poisoning or ingestion of a toxic substance
- Deep puncture wounds, especially on the chest or abdomen
- Broken bones or suspected spinal injuries
- Eye injuries involving penetration or chemical exposure
A good rule of thumb: after providing initial first aid, monitor your dog closely for 15 minutes. If their condition does not improve or gets worse, call your vet or head to the nearest emergency clinic. Trust your instincts. You know your dog better than anyone, and if something feels wrong, it probably is.
Dog First Aid Kit Maintenance and Restocking
A first aid kit is only useful if its contents are current, clean, and complete. Many dog owners build a kit, tuck it away, and forget about it until an emergency strikes, only to discover expired medications and dried-out antiseptic wipes. Here is how to keep your kit in fighting shape year-round:
Set a quarterly check-in. Every three months, open your kit and inspect every item. Check expiration dates on medications, saline, and antiseptic. Replace anything that is expired, opened, or looks damaged. A quick calendar reminder on your phone makes this habit stick.
Restock immediately after use. The worst time to discover you are out of gauze is during a second emergency. After you use any item from your kit, replace it within 48 hours. Keep a written list of contents inside the kit so you can check it off quickly.
Make seasonal adjustments. Your dog’s risks change with the weather. In spring and summer, add extra tick remover tools, a pet-safe insect repellent, and cooling pads for heatstroke risk. In fall and winter, include paw balm for cracked pads and an extra emergency blanket for cold-weather exposure.
Adapt for your dog’s life stage. Puppies are prone to different injuries than senior dogs. As your dog ages, adjust your kit. Add joint supplements for older dogs, and keep puppy-specific items like a smaller muzzle on hand for young dogs.
What NOT to Put in Your Dog First Aid Kit
Just as important as knowing what to include is knowing what to leave out. Some common household items can make canine injuries worse or even put your dog’s life at risk:
- Human pain medications – Ibuprofen, acetaminophen, naproxen, and aspirin are all toxic to dogs at human doses. Never give your dog any pain medication unless your vet has specifically recommended it and provided a dosage.
- Rubbing alcohol – Applying rubbing alcohol to a wound causes severe tissue damage and pain. It is also toxic if your dog licks it off their skin.
- Hydrogen peroxide on wounds – While 3% hydrogen peroxide has a place in your kit for inducing vomiting under vet guidance, it should never be applied directly to wounds. It destroys healthy cells and delays the healing process.
- Human adhesive bandages (Band-Aids) – The adhesive on human bandages is designed for human skin and can pull your dog’s fur and damage their skin when removed. Use gauze and vet wrap instead.
- Expired medications – Expired medications can lose effectiveness or become chemically unstable. Check dates regularly and dispose of expired items safely.
When in doubt about any item, call your vet and ask. A two-minute phone call can prevent a dangerous mistake.
FAQ
What are the essential items for a dog first aid kit?
Every dog first aid kit should contain blunt-tip scissors, tweezers, a digital rectal thermometer, a tick remover tool, a needleless syringe, a muzzle, disposable gloves, gauze pads and rolls, self-adhering vet wrap, antiseptic wipes, saline solution, antibiotic ointment, styptic powder, medical tape, hydrogen peroxide (3%), diphenhydramine, an emergency blanket, and an emergency contact card with your vet’s number and the ASPCA Poison Control hotline.
How do I make a dog first aid kit at home?
Start with a waterproof, labeled container. Gather your tools first: blunt-tip scissors, tweezers, a digital thermometer, a tick remover, a muzzle, gloves, and a flashlight. Then add wound care supplies including gauze, vet wrap, antiseptic wipes, saline, antibiotic ointment, and styptic powder. Include medications like hydrogen peroxide and Benadryl with dosing instructions from your vet. Finish with emergency contact numbers, an emergency blanket, vaccination records, and a photo of your dog. Store it in an accessible, consistent location.
What medications should be in a dog first aid kit?
The core medications for a dog first aid kit are 3% hydrogen peroxide (for inducing vomiting only under veterinary direction), diphenhydramine (Benadryl) for allergic reactions, and a backup supply of any prescription medications your dog takes daily. Never include ibuprofen, acetaminophen, aspirin, or any human pain reliever without explicit veterinary approval, as these can be toxic or fatal to dogs.
How often should I check my dog first aid kit supplies?
Inspect your dog first aid kit every three months. Check all expiration dates on medications, saline, and antiseptic products. Replace anything that has been opened, dried out, or expired. Restock any items you have used immediately after each use. Adjust the kit seasonally, adding tick tools for summer and paw balm for winter months.
Be Prepared Before You Need to Be
Having a complete set of dog first aid kit essentials at home is not about expecting the worst. It is about being the kind of dog owner who can handle the unexpected with confidence. The items in this guide cover the vast majority of at-home canine emergencies, from minor cuts and insect stings to situations that need quick stabilization before a vet visit.
Take an hour this week to gather these supplies, organize them in a waterproof container, and store the kit somewhere everyone in your household can find it. Write your vet’s number on the inside lid, set a quarterly reminder to check expiration dates, and restock anything you use right away. Your dog depends on you to be ready when it matters most.
For more guidance on keeping your dog healthy and safe, explore our other resources on choosing the right dog breed for your family and building a solid foundation of preventative care.